

Post Date: November 22, 2019
Last Updated: November 02, 2026
Introduction
Installing Python from source code on Linux gives administrators and developers greater control over the Python version, installation directory, and build configuration.
The default Python version available through a Linux package manager may not always meet your application requirements. In such situations, you can download the Python source code, compile it, and install the required version independently.
In this tutorial, we will explain how to install Python from source on Linux, including the required dependencies, compilation commands, custom installation paths, and verification steps.
We will also explain how to install multiple Python versions without affecting the system’s default Python installation.
1. Prerequisites
Before starting the Python source installation, ensure that you have:
- A Linux server with Ubuntu, Debian, CentOS, RHEL, or a compatible distribution.
- Root or sudo privileges.
- An active internet connection.
- Sufficient disk space for downloading and compiling the source code.
- A C compiler and the required development libraries.
Note: The commands in this tutorial use a version placeholder. Replace X.Y.Z with the exact Python release version you intend to install. Always choose a currently supported Python release from the official Python website.
Official download page: https://www.python.org/downloads/source/
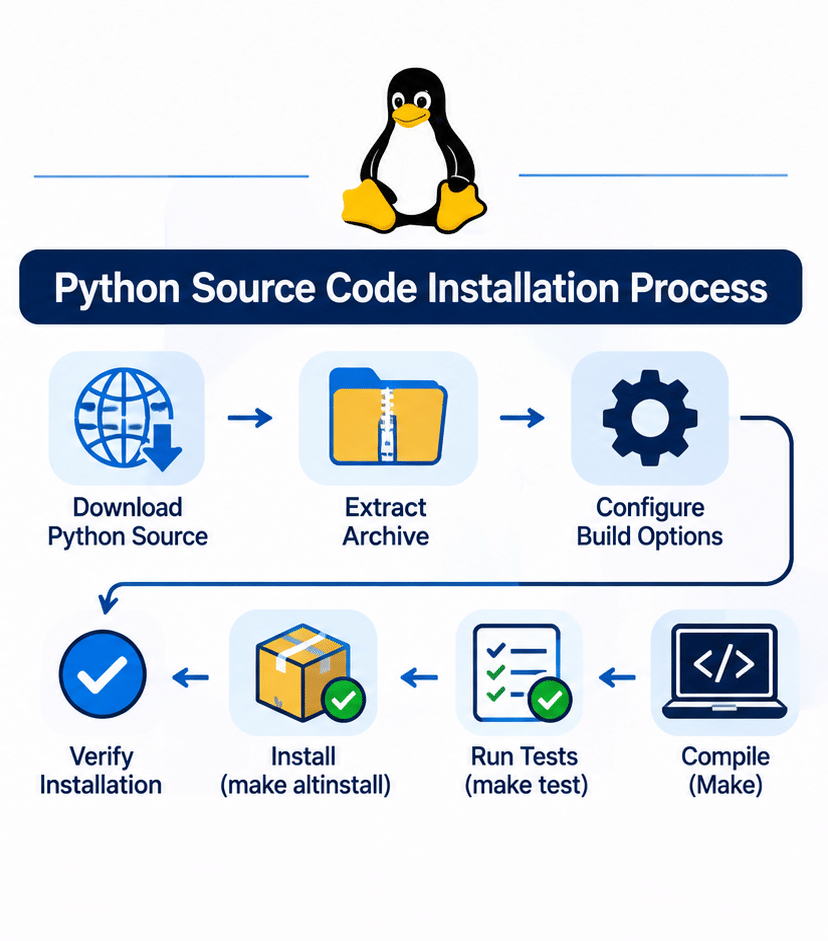
2. Install Python Build Dependencies
Before compiling Python, we need to install the required development tools and libraries.
These dependencies allow Python to build optional standard library modules such as SSL, SQLite, compression, and database-related modules.
For Ubuntu/Debian
Execute the following commands:
sudo apt update

sudo apt install -y \
build-essential wget curl \
libssl-dev zlib1g-dev libbz2-dev \
libreadline-dev libsqlite3-dev \
libffi-dev liblzma-dev \
libncurses-dev tk-dev uuid-dev \
libgdbm-dev pkg-config
For CentOS/RHEL/Fedora
For distributions using DNF, execute:
sudo dnf install -y \
gcc gcc-c++ make wget curl \
openssl-devel zlib-devel bzip2-devel \
readline-devel sqlite-devel \
libffi-devel xz-devel \
ncurses-devel tk-devel \
gdbm-devel libuuid-devel \
pkgconf-pkg-config
Package names may vary depending on the Linux distribution and release.
3. Download Python Source Code
Once the required dependencies are installed, download the Python source archive.
Visit the official Python source archive:
Select the required release directory and download its .tgz source archive.
For example, replace X.Y.Z with your selected Python version:
PYTHON_VERSION=X.Y.Z

wget https://www.python.org/ftp/python/${PYTHON_VERSION}/Python-${PYTHON_VERSION}.tgz
You can also verify that the downloaded archive exists:
ls -lh Python-${PYTHON_VERSION}.tgz
For production environments, verify the archive’s checksum against the official Python release information before extracting it.
4. Extract the Python Source Archive
After downloading the source archive, extract it using the following command:
tar -xzf Python-${PYTHON_VERSION}.tgz
Navigate to the extracted directory:
cd Python-${PYTHON_VERSION}
You should now be inside the Python source directory.
Check the extracted files:
ls -l
You will find the configuration script, Makefile-related source files, and other files required for compiling Python.
5. Configure the Python Installation
The next step is to configure the Python source code before compilation.
Execute:
./configure
The configuration script checks the system environment, compiler, and available libraries required to build Python.
It also generates the Makefile, which contains the instructions needed for the compilation process.
Optional performance optimization:
For a performance-optimized build, you can use:
./configure --enable-optimizations
This enables Profile Guided Optimization (PGO). It can improve runtime performance but increases the compilation time.
For a custom installation directory, you can use the --prefix option, which we will explain later.
6. Compile and Test Python
Once configuration is completed successfully, compile the Python source code.
Execute:
make -j "$(nproc)"
The make command starts the compilation process.
The -j option allows multiple compilation jobs to run simultaneously. The nproc command identifies the number of available processing units.
After compilation, run the test suite:
make test
This command executes Python’s test suite to check whether the compiled interpreter and its supported modules are working correctly.
Testing may take some time depending on the server’s CPU and available resources.
If the tests report failures, review the output and resolve any missing dependencies or build-related issues before proceeding.
7. Install Python on Linux
After successful compilation and testing, install Python.
We recommend using:
sudo make altinstall
The altinstall target installs the version-specific Python executable without creating or replacing the generic python3 executable.
For example, a Python 3.x installation may create:
/usr/local/bin/python3.x
Why use make altinstall instead of make install?
Using make install can overwrite or interfere with the existing python3 executable.
The official Python documentation recommends make altinstall when installing another Python version alongside an existing installation.
This is particularly important on production Linux servers where system utilities may depend on the distribution-provided Python interpreter.
8. Install Python in a Custom Directory
Suppose your server already has a Python version installed, but you need another version for a specific application.
In this situation, installing the new version in a separate directory is a better approach.
For example, assume you want to install Python under:
/opt/python/X.Y.Z
Navigate to the extracted Python source directory and execute:
./configure --prefix=/opt/python/X.Y.Z
This tells the configuration script to use the specified directory as the installation prefix.
Next, compile Python:
make -j "$(nproc)"
Run the test suite:
make test
Finally, install Python:
sudo make altinstall
After installation, the Python executable will be available at a version-specific location similar to:
/opt/python/X.Y.Z/bin/python3.x
You can execute this Python version directly without changing the system’s default Python executable.
For example:
/opt/python/X.Y.Z/bin/python3.x --version
This approach is useful when maintaining multiple Python versions for different applications.
9. Verify the Python Installation
After completing the installation, verify that Python is working correctly.
For a default /usr/local installation:
/usr/local/bin/python3.x --version
For a custom installation:
/opt/python/X.Y.Z/bin/python3.x --version
Check the installation path:
/opt/python/X.Y.Z/bin/python3.x -c "import sys; print(sys.executable)"
You can also check whether pip is available:
/opt/python/X.Y.Z/bin/python3.x -m pip --version
If pip is not available and the Python build includes ensurepip, initialize it using:
/opt/python/X.Y.Z/bin/python3.x -m ensurepip --upgrade
You can now create a virtual environment for your application:
/opt/python/X.Y.Z/bin/python3.x -m venv /opt/myapp/venv
Activate it:
source /opt/myapp/venv/bin/activate
Your application can now use this Python environment independently of the system Python installation.
Conclusion
Installing Python from source code provides flexibility in choosing the required Python version, configuring build options, and selecting a custom installation directory.
By using make altinstall and a separate installation prefix, you can maintain multiple Python versions without unnecessarily modifying the system’s default Python interpreter.
For production servers, always use a supported Python release, install the necessary development dependencies, and test the compiled installation before deploying applications.
Frequently Asked Questions
1. Why should I install Python from source code?
Installing Python from source allows you to select a specific release, configure compilation options, and customize the installation directory instead of relying entirely on the version provided by your Linux distribution.
2. What is the difference between make install and make altinstall?
make install installs Python with the generic python3 executable, which can interfere with an existing installation.
make altinstall installs the version-specific executable and is recommended when maintaining multiple Python versions.
3. Can I install multiple Python versions on the same Linux server?
Yes. You can install different Python versions in separate directories using the --prefix configuration option. This allows each version to operate independently.
4. Where does Python get installed by default?
When no custom prefix is specified, the default installation prefix for a typical Unix source build is /usr/local.
5. How do I check the installed Python version?
Execute:
python3.x --version
Alternatively, specify the complete executable path:
/opt/python/X.Y.Z/bin/python3.x --version
Related Articles
How to install python3 and pip3 in Ubuntu 16.04
How to Install Python, pip, and Boto on Windows Server
Talk to Our Technology Experts
Need assistance installing Python from source, managing multiple Python versions, or configuring Python applications on Linux servers? Our team can help with Python installation, server configuration, application deployment, and ongoing Linux server management.