
Post Date: February 24, 2025
Last Updated: November 02, 2026
Introduction
Maintaining an eCommerce website is essential to ensure security, stability, and a seamless shopping experience. However, performing software upgrades, installing security patches, updating extensions, migrating databases, or making server-level changes while customers are actively using the store can lead to unexpected errors, checkout failures, and service interruptions.
Magento 2 Maintenance Mode provides a built-in solution to temporarily restrict public access to your online store while essential maintenance activities are performed. When maintenance mode is enabled, visitors receive an HTTP 503 (Service Unavailable) response instead of accessing the storefront.
One of the key advantages of Magento 2 maintenance mode is its IP whitelisting functionality. Administrators and developers can allow specific IP addresses to access the store during maintenance, making it possible to test updates, verify functionality, and perform necessary checks without exposing an incomplete website to customers.
In this step-by-step guide, we will explain how to enable and disable maintenance mode in Magento 2, allow specific IP addresses, customise the maintenance page, and troubleshoot common issues. We will also cover important checks to perform before restoring your store to normal operation.
1. What Is Maintenance Mode in Magento 2?
Magento 2 maintenance mode is a built-in feature that temporarily restricts access to the storefront while developers or administrators perform maintenance activities.
When maintenance mode is activated, Magento creates a .maintenance.flag file inside the var/ directory. This file indicates that the application is in maintenance mode.
Visitors who are not included in the allowed IP list receive a 503 Service Unavailable response.
When Should You Enable Magento Maintenance Mode?
Maintenance mode is recommended during the following activities:
- Magento version upgrades and software updates.
- Security patch installations.
- Third-party extension installations or updates.
- Database migrations and schema modifications.
- Theme and storefront customisations.
- Server maintenance and infrastructure upgrades.
- Production deployments and configuration changes.
Using maintenance mode helps minimise customer-facing errors and provides a controlled environment for performing important updates.
2. Prerequisites Before Enabling Maintenance Mode
Before enabling maintenance mode in Magento 2, make sure the following requirements are met:
- SSH access to the Magento server.
- Access to the Magento application root directory.
- Appropriate permissions to execute Magento CLI commands.
- A recent backup of the database and application files.
- The IP addresses of administrators and developers who require access during maintenance.
- A planned maintenance window to minimise customer disruption.
Important: Execute Magento CLI commands using the appropriate Magento filesystem owner account.
3. How to Enable Maintenance Mode in Magento 2
Magento 2 provides a built-in CLI command to enable maintenance mode.
Step 1: Navigate to the Magento Root Directory
Connect to your Magento server through SSH and navigate to the application root directory.
cd /var/www/html/magento2
Replace the example path with your actual Magento installation directory.
Step 2: Enable Maintenance Mode
Execute the following command:
php bin/magento maintenance:enable
Expected output:
Enabled maintenance mode
Once enabled, Magento restricts public access to the storefront and displays a maintenance page with an HTTP 503 response.
Step 3: Verify Maintenance Mode Status
To confirm whether maintenance mode is active, execute:
php bin/magento maintenance:status
Expected output:
Maintenance mode is active.
This confirms that Magento maintenance mode has been successfully enabled.
4. How to Allow Specific IP Addresses During Maintenance Mode
Magento 2 provides an IP whitelisting feature that allows selected users to access the storefront even when maintenance mode is enabled.
This is particularly useful for developers, administrators, and QA teams who need to test website functionality during maintenance.
Allow a Single IP Address
To allow a single IP address, execute:
php bin/magento maintenance:allow-ips 192.168.1.100
Replace 192.168.1.100 with the actual public IP address that requires access.
Allow Multiple IP Addresses
To allow multiple IP addresses, specify them in the same command:
php bin/magento maintenance:allow-ips 192.168.1.100 192.168.1.101
Alternatively, you can enable maintenance mode with IP exemptions directly:
php bin/magento maintenance:enable --ip=192.168.1.100 --ip=192.168.1.101
Verify Allowed IP Addresses
Run the following command:
php bin/magento maintenance:status
Check the output to confirm that the required IP addresses are exempt from maintenance mode.
Remove All Allowed IP Addresses
If you want to block all visitors, including previously whitelisted IP addresses, execute:
php bin/magento maintenance:allow-ips --none
Note: Make sure you use the correct public IP addresses. If your store is behind a reverse proxy, CDN, or load balancer, verify which client IP address Magento receives.
5. How to Customise the Magento 2 Maintenance Page
Magento 2 provides a default maintenance page that displays a Service Unavailable message whenever maintenance mode is enabled.
However, store owners can customise this page to display their company branding, maintenance notifications, estimated completion time, and customer support information.
Default Maintenance Page Location
The default maintenance page template is located at:
pub/errors/default/503.phtml
Create a Custom Maintenance Page
Follow these steps to customise the maintenance page.
Step 1: Navigate to the Magento Errors Directory
cd /var/www/html/magento2/pub/errors
Step 2: Create a Custom Maintenance Page
Create or edit the following file:
nano 503.phtml
Step 3: Add Custom HTML Content
You can use the following example:
<!DOCTYPE html>
<html lang="en">
<head>
    <meta charset="UTF-8">
    <meta name="viewport" content="width=device-width, initial-scale=1.0">
    <title>Store Under Maintenance</title>
    <style>
        body {
            font-family: Arial, sans-serif;
            text-align: center;
            padding: 100px 20px;
            background: #f5f5f5;
        }
        .maintenance-box {
            max-width: 600px;
            margin: auto;
            padding: 40px;
            background: #ffffff;
            border-radius: 10px;
        }
        h1 {
            color: #333333;
        }
        p {
            color: #666666;
            line-height: 1.6;
        }
    </style>
</head>
<body>
    <div class="maintenance-box">
        <h1>We'll Be Back Soon!</h1>
        <p>
            Our online store is currently undergoing scheduled
            maintenance to improve your shopping experience.
        </p>
        <p>Thank you for your patience.</p>
    </div>
</body>
</html>
Save the file after making the necessary changes.
Step 4: Verify the Custom Maintenance Page
Access your Magento storefront from an IP address that is not whitelisted and verify that the customised maintenance page is displayed.
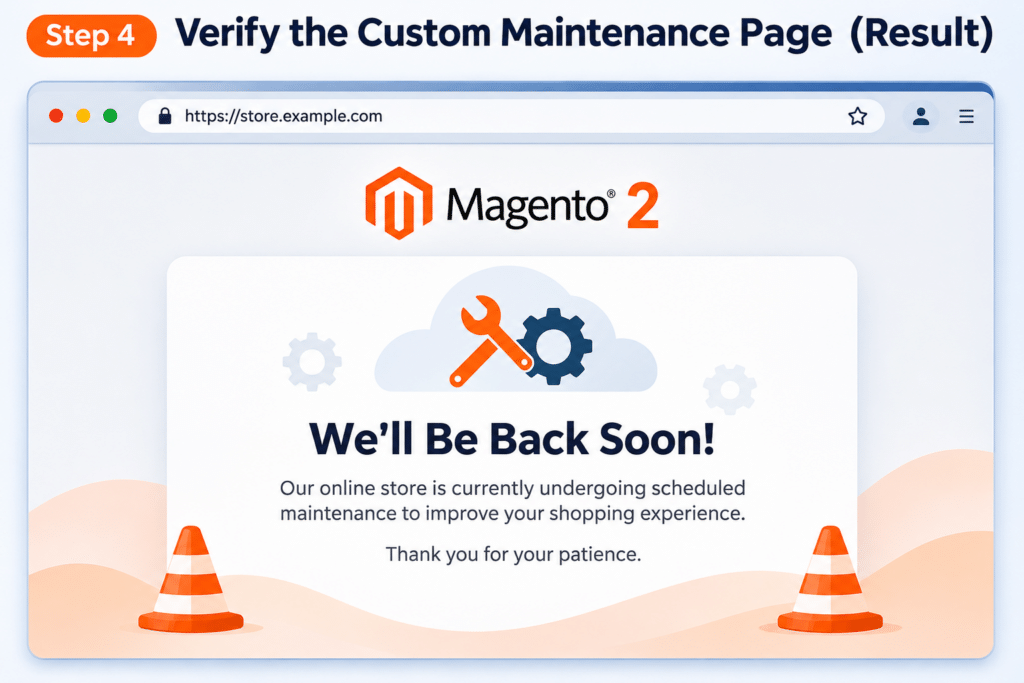
Note: The custom page should be configured using Magento’s error-page mechanism. The pub/errors/503.phtml file is the custom override location; retain the default template as a reference and test the result in your specific Magento version and server configuration.
For simple template changes, static content deployment is generally unnecessary. If you also modify static CSS, JavaScript, or theme assets, deploy the relevant static content as required.
6. How to Disable Maintenance Mode in Magento 2
After completing all maintenance activities, disable maintenance mode to restore public access to your Magento storefront.
Step 1: Disable Maintenance Mode
Navigate to the Magento root directory and execute:
php bin/magento maintenance:disable
Expected output:
Disabled maintenance mode
Step 2: Verify Maintenance Mode Status
Run the following command:
php bin/magento maintenance:status
Expected output:
Maintenance mode is not active.
This confirms that maintenance mode has been successfully disabled.
Step 3: Clear Magento Cache
To ensure the latest application changes are reflected on the storefront, execute:
php bin/magento cache:clean
If required, you can also flush the Magento cache:
php bin/magento cache:flush
Step 4: Verify Storefront Accessibility
Open your Magento storefront in a browser and check the following:
- Homepage loads successfully.
- Product and category pages are accessible.
- Customer login and registration work.
- Add-to-cart functionality works correctly.
- Checkout and payment functionality are operational.
- Admin panel access is available.
- No unexpected 500 or 503 errors appear.
7. Troubleshooting Common Magento 2 Maintenance Mode Issues
Even after executing the maintenance commands, administrators may sometimes encounter maintenance-related errors. Below are some common issues and their solutions.
Issue 1: Magento Store Still Displays the Maintenance Page After Disabling Maintenance Mode
Possible cause:
The maintenance flag file may still exist, or a cache or proxy layer may be serving an outdated response.
Solution:
First, verify the maintenance mode status:
php bin/magento maintenance:status
If maintenance mode is still active, disable it:
php bin/magento maintenance:disable
If the maintenance flag remains after confirming the application state, inspect and remove it manually if appropriate:
rm -f var/.maintenance.flag
Then clear the cache:
php bin/magento cache:clean
Recheck the storefront.
Issue 2: Getting a 503 Service Unavailable Error After Disabling Maintenance Mode
Possible cause:
A 503 error may be caused by stale cache, web server configuration issues, PHP errors, or application-level problems.
Solution:
Clear the Magento cache:
php bin/magento cache:flush
Check the web server and PHP service status.
For Apache:
systemctl status apache2
For Nginx:
systemctl status nginx
Review the Magento logs:
tail -n 50 var/log/system.log
tail -n 50 var/log/exception.log
Also inspect the web server error logs to identify the cause of the 503 response.
Issue 3: Whitelisted IP Address Cannot Access the Store
Possible cause:
The configured IP address may not match the actual client IP address received by Magento.
Solution:
Check the public IP address of the system accessing the storefront and update the allowed IP list:
php bin/magento maintenance:allow-ips 192.168.1.100
If your application uses a CDN, reverse proxy, or load balancer, verify the forwarded client IP configuration.
Issue 4: Storefront Is Accessible Even After Enabling Maintenance Mode
Possible cause:
The storefront may be serving cached pages through a CDN, reverse proxy, or full-page cache.
Solution:
Clean the Magento cache:
php bin/magento cache:clean
Check the CDN or reverse proxy cache configuration and verify that maintenance responses are not being bypassed.
For multi-node deployments, verify that maintenance mode is enabled consistently across all application nodes.
Issue 5: Maintenance Mode Remains Active on a Multi-Server Environment
Possible cause:
The maintenance flag may not be synchronised across multiple application servers.
Solution:
Verify the maintenance flag and maintenance status on every application node. Ensure that all nodes use the correct shared or synchronised application filesystem and that traffic is not being routed to an unmodified node.
8. Magento 2 Maintenance Mode Best Practices
To ensure a smooth maintenance process and minimise downtime, follow these recommended practices:
- Take a backup: Back up the Magento application files and database before performing major changes.
- Schedule maintenance: Perform updates during low-traffic hours to reduce the impact on customers.
- Whitelist administrator IPs: Allow authorised developers and administrators to test the application.
- Stop background consumers when required: Follow the deployment procedure for queue consumers and scheduled jobs.
- Use a custom maintenance page: Display a clear message and relevant customer support details.
- Test before going live: Verify product pages, customer accounts, cart, checkout, and payment functionality.
- Monitor application logs: Review Magento, PHP, and web server logs for errors.
- Disable maintenance mode promptly: Restore customer access immediately after completing the maintenance work.
Conclusion
Magento 2 maintenance mode is an essential feature for maintaining the security, stability, and performance of an eCommerce website. Whether you are upgrading Magento, installing security patches, updating extensions, migrating databases, or performing server maintenance, enabling maintenance mode helps prevent customers from experiencing incomplete updates, broken pages, and unexpected application errors.
By using Magento CLI commands, administrators can easily enable or disable maintenance mode, whitelist authorised IP addresses, and customise the maintenance page to provide a better customer experience during planned downtime.
Following the recommended maintenance practices, including taking backups, checking application logs, testing critical storefront functionality, and verifying the maintenance status before restoring public access, helps ensure a smooth and reliable maintenance process.
Need professional assistance with Magento 2 maintenance, upgrades, or server administration? The technical team at Pheonix Solutions can help you maintain a secure, stable, and high-performing eCommerce environment. Contact our experts to discuss your requirements.
Frequently Asked Questions (FAQ)
1. How do I enable maintenance mode in Magento 2?
Navigate to your Magento root directory and execute:
php bin/magento maintenance:enable
This enables maintenance mode and displays a 503 Service Unavailable page to visitors who are not whitelisted.
2. How do I disable maintenance mode in Magento 2?
Execute the following command from your Magento root directory:
php bin/magento maintenance:disable
This restores normal storefront access.
3. How can I allow my IP address during Magento 2 maintenance mode?
Use the following command:
php bin/magento maintenance:allow-ips YOUR_IP_ADDRESS
Replace YOUR_IP_ADDRESS with your actual public IP address.
Related Articles
- The Magento Based Website Is Not Working With HTTPS
- How to Resolve the Autoload Error While Installing Magento 2 in Ubuntu 18.04 & 20.04
- How to Update Secure and Unsecure URLs Directly in the Magento Database
Talk to Our Experts
Looking for reliable Magento development, eCommerce maintenance, or infrastructure support?
Pheonix Solutions provides technology services covering Magento development, server administration, cloud infrastructure, DevOps, website maintenance, and technical support.
Our experts can help you maintain, troubleshoot, and optimise your eCommerce platform.
Contact our experts to discuss your requirements.