
Post Date: May 23, 2019
Last Updated: October 27, 2026
Introduction
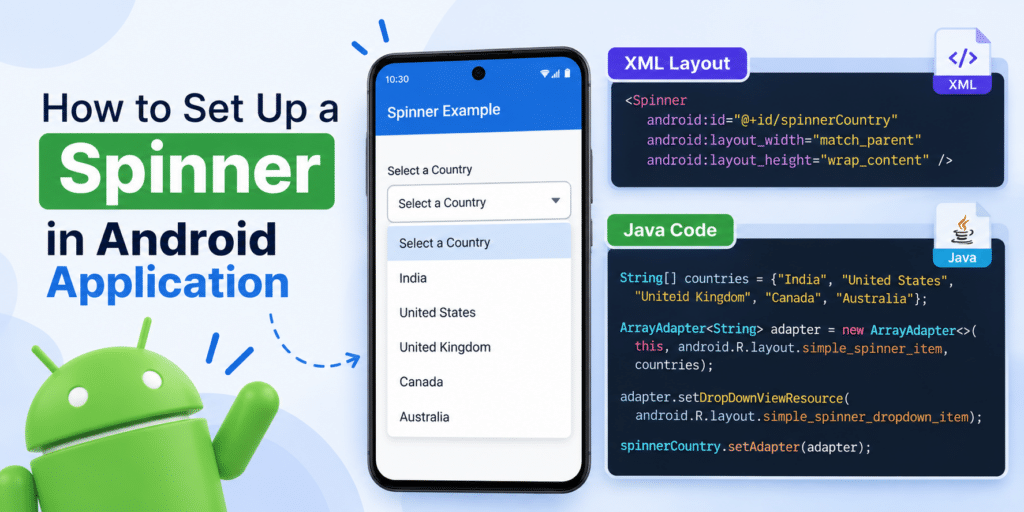
An Android Spinner is a user interface component that allows users to select one item from a list of available options. It displays the currently selected item and provides a dropdown list when the user interacts with it.
Spinners are commonly used in Android applications for selecting categories, store names, countries, languages, and other predefined values. They help organize options while keeping the user interface simple.
In this tutorial, we will learn how to implement a Spinner in an Android application using XML and Java. We will cover declaring the Spinner in the layout file, creating an ArrayAdapter, defining a string array in the resource file, and handling item selection using the AdapterView.OnItemSelectedListener interface.
Prerequisites
Before starting the implementation, ensure that you have the following:
- Android Studio installed on your computer.
- Basic knowledge of Java and XML.
- An Android application project with an Activity or Fragment.
- A layout XML file where the spinner will be declared.
- An Android emulator or physical device to test the application.
Implementation
Step 1: Declare the Spinner in the XML Layout File
A Spinner can be implemented by declaring it in an XML layout file or creating it programmatically. In this tutorial, we will declare the spinner in XML.
The Spinner requires an adapter to provide its list of options. First, define the spinner in your layout file.
<Spinner
    android:layout_width="match_parent"
    android:layout_height="wrap_content"
    android:layout_marginTop="5dp"
    android:id="@+id/spinner" />
Code explanation:
- Android defines the width of the spinner.
- Android defines its height.
- Android adds spacing above the spinner.
- Android assigns an identifier that can be referenced in Java code.
After declaring the Spinner, you can populate it with the required values using an adapter.
Step 2: Create an ArrayAdapter for the Spinner.
An ArrayAdapter connects a data source to a compatible Android UI component. For a spinner, it provides the list of values that users can select.
The adapter can be populated using an array defined in Java or a string-array resource defined in an XML file. In this tutorial, we will use a resource array to keep the values separate from the application logic.
Android provides the ArrayAdapter class for this purpose. In the following steps, we will create the adapter and connect it to the spinner.
Step 3: Declare the String Array in the Values Resource File
To define the items displayed in the spinner, open the res/values/strings.xml file and add a string array resource.
<?xml version="1.0" encoding="utf-8"?>
<resources>
    <string-array name="spinner">
        <item>Item1</item>
        <item>Item2</item>
        <item>Item2</item>
    </string-array>
</resources>
The string-array resource contains the values displayed in the Spinner dropdown. You can replace the sample items with the actual values required by your application.
For example, if the Spinner is used to display store names, you can add each store name as an item in the array.
Step 4: Initialize the Spinner and Configure the ArrayAdapter
After defining the spinner and its string-array resource, initialize the spinner in your fragment and create an ArrayAdapter to supply the data.
The original example uses the Spinner ID spinner_store_name and the resource array store_name. Make sure these names match the IDs and resource names in your actual project.
spinner = view.findViewById(R.id.spinner_store_name);

ArrayAdapter<CharSequence> mAdapter =
        ArrayAdapter.createFromResource(
                getContext(),
                R.array.store_name,
                android.R.layout.simple_spinner_dropdown_item
        );

mAdapter.setDropDownViewResource(
        android.R.layout.simple_spinner_dropdown_item
);

spinner.setAdapter(mAdapter);
Code explanation:
- findViewById() retrieves the Spinner from the Fragment’s view.
- ArrayAdapter. createFromResource() creates an adapter using a string-array resource.
- getContext() provides the context required to create the adapter.
- setDropDownViewResource() specifies the layout used to display dropdown items.
- setAdapter() connects the adapter to the Spinner.
Important: The original screenshots show spinner as the ID and string-array name in Steps 1 and 3, but spinner_store_name and store_name in Step 4. These names must be consistent for the code to work. Either update the XML and resource names or update the Java references accordingly.
Step 5: Implement AdapterView. OnItemSelectedListener
To perform an action when a user selects an item from the spinner, implement the AdapterView. OnItemSelectedListener interface.
This interface provides two methods:
- onItemSelected() is called when an item is selected.
- onNothingSelected() is called when no selection is available.
The following code shows the method declarations from the original example:
@Override
public void onItemSelected(
        AdapterView<?> parent,
        View view,
        int position,
        long id) {
    // Handle the selected item here
}

@Override
public void onNothingSelected(AdapterView<?> parent) {
    // Handle the absence of a selection if required
}
Inside onItemSelected(), the position parameter identifies the selected item’s position in the adapter. You can use this position to retrieve the selected value and perform an action based on the user’s choice.
Step 6: Implement the Listener in Your Activity or Fragment
If you want your activity or fragment to implement the listener directly, declare AdapterView. OnItemSelectedListener in the class declaration.
For example, in a Fragment:
public class YourFragment extends Fragment
        implements AdapterView.OnItemSelectedListener {

    // Add the required listener methods here.
}
After implementing the interface, provide the method bodies for onItemSelected() and onNothingSelected().
You must also register the listener with the Spinner:
spinner.setOnItemSelectedListener(this);
This registration connects the spinner’s selection events to the listener implemented by your class.
Note: The listener may be called when the spinner is initially populated, even before the user manually selects an item. If your application should respond only to deliberate user selections, account for the initial callback in your implementation.
Conclusion
An Android Spinner provides a simple way to display a list of options and allow users to select one value. By declaring the Spinner in XML, defining a string array in the resource file, and configuring an ArrayAdapter, you can populate the dropdown with the required values.
Implementing AdapterView. OnItemSelectedListener allows your application to respond to selection events and use the selected value in its functionality.
You can extend this implementation by loading values from a database, displaying store names dynamically, or updating other UI components based on the selected item.
FAQ
1. What is a spinner in Android?
A Spinner is an Android UI component that displays a selected value and provides a dropdown list of available options.
2. What is the purpose of an ArrayAdapter?
An ArrayAdapter connects an array or list of data to a UI component such as a Spinner and provides the views used to display its items.
3. How can I handle Spinner item selection?
Implement AdapterView. OnItemSelectedListener and add the required logic inside onItemSelected(). Register the listener with the spinner using setOnItemSelectedListener().
4. Can Spinner values be defined in an XML file?
Yes. You can define the values inside a string-array resource in res/values/strings.xml and load them into the spinner using ArrayAdapter. createFromResource().
Related Links
Official Links
- Android Developers: Add Spinners to Your App
- Android Developers: Spinner API Reference
- Android Developers: ArrayAdapter API Reference
- Android Studio
Talk to Our Experts
Need help developing Android applications or implementing interactive user interface components? Our team can help you build and improve mobile applications according to your project requirements.
Contact our experts to discuss your project.