
Post Date: April 21, 2020
Last Updated: November 09, 2026
Introduction
This guide explains how to install VestaCP on Linux server using the official installation script. VestaCP (Vesta Control Panel) is an open-source hosting control panel. It lets you manage websites, email accounts, FTP accounts, MySQL databases, and DNS records from one web interface.
The original guide covered the basic installation. This version adds the prerequisites, the firewall port, a verification step, and troubleshooting, so the setup is less likely to fail partway through.
Warning: Only install VestaCP on Linux server on a fresh, clean operating system. The installer sets up its own web, mail, DNS, and database services and can conflict with software that is already installed. Also note that Vesta’s development has slowed, so check the project’s status before using it in production. HestiaCP is a maintained fork with a similar interface.
Prerequisites
Before you install VestaCP on Linux server, make sure you have:
- Root access to the server over SSH
- A fresh installation of a supported operating system (RHEL/CentOS 5, 6, 7; Debian 7, 8, 9; Ubuntu 12.04 to 18.10)
- At least 512 MB of RAM, 20 GB of disk space, and a 1 GHz CPU
- A valid email address and, ideally, a fully qualified hostname
- Port 8083 reachable through your firewall or cloud security group
Architecture
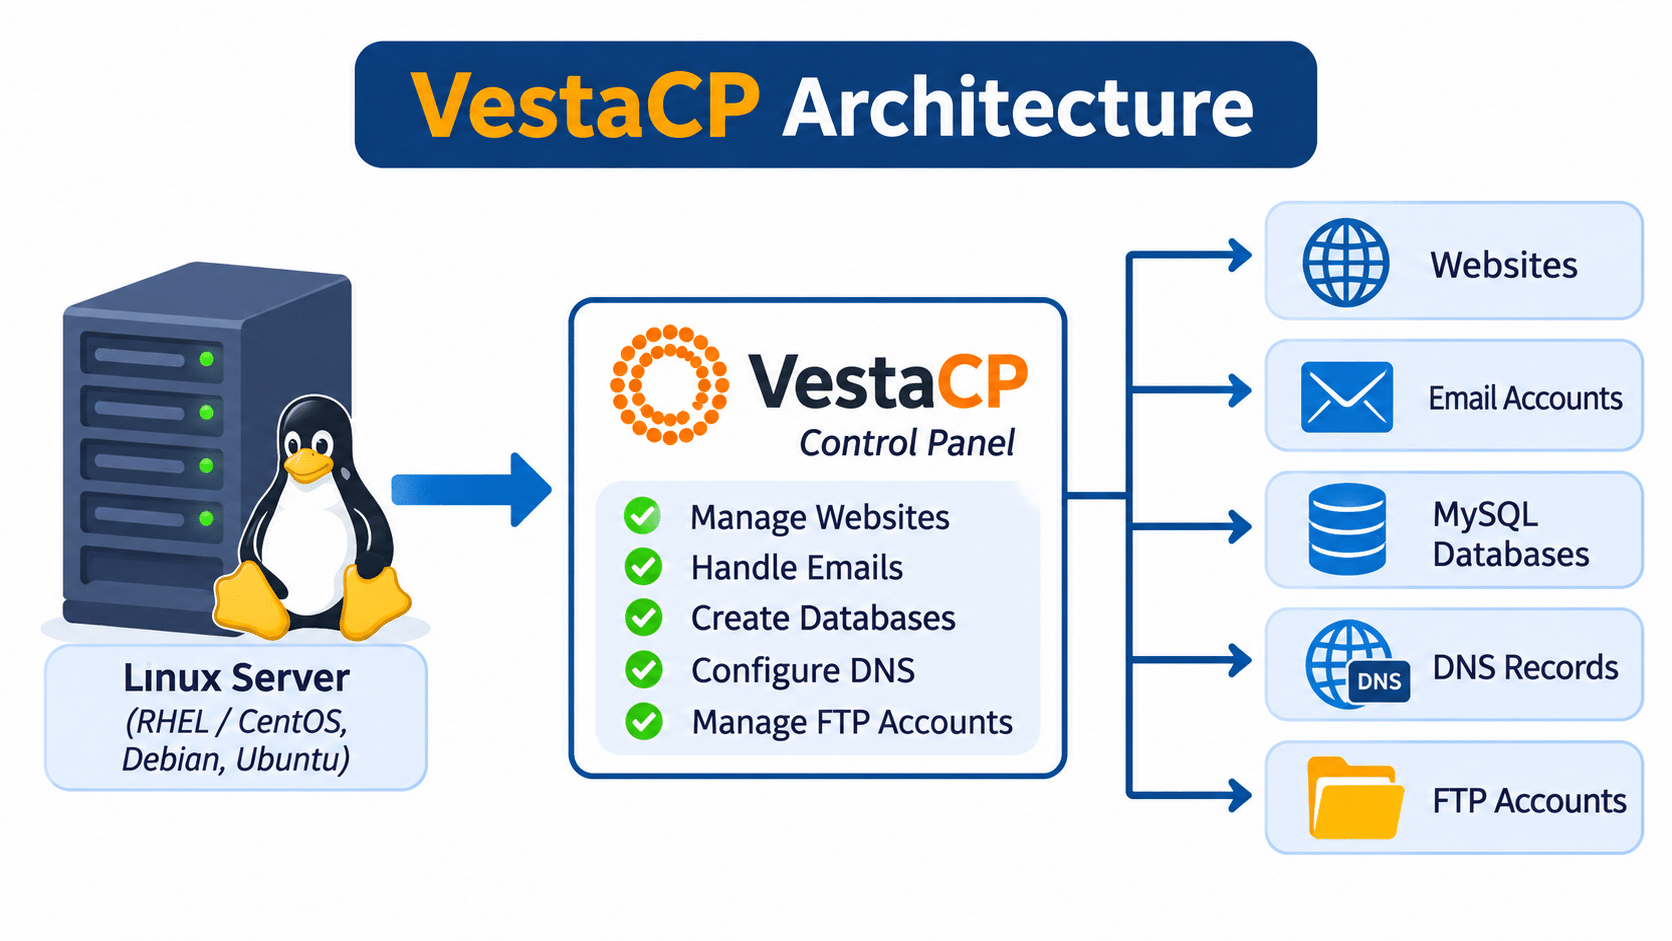
vst-install.shis the installer script. It detects your operating system and downloads the packages it needs- The script installs the web stack (Nginx and Apache), PHP, MySQL, the mail stack (Exim and Dovecot), DNS (named), and FTP
- It also configures security tools such as iptables and Fail2ban
- The control panel itself runs on port 8083 over HTTPS
- You manage everything through the panel, which is protected by the
adminuser and a generated password
The image below shows how the installation fits together. For the full list of installer options, see the official Vesta documentation.
Steps to Install VestaCP on Linux Server
1. Connect to Your Server as Root
Log in to your server over SSH:
ssh root@your-server-IP -p your-ssh-port
2. Download the Installation Script
curl -O https://vestacp.com/pub/vst-install.sh
Note: The original guide used
http://. Usehttps://so the script is downloaded over an encrypted connection.
3. Run the Installation Script
This is the main command to install VestaCP on Linux server:
bash vst-install.sh
The script lists the software it is about to install. Type y and press Enter to continue. You will then be asked for a valid email address. Vesta uses it to send your login details. If you enter it incorrectly, don’t worry, because the credentials are also shown in the terminal when the installation finishes, and you can change the admin email later.
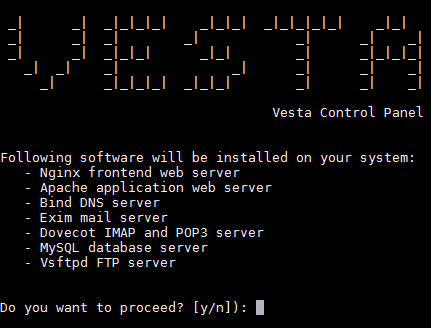
The installation takes several minutes. Do not close the terminal until it completes.
4. Open Port 8083
If a firewall or cloud security group is active, allow TCP port 8083 so you can reach the panel. Vesta configures iptables itself, but cloud providers such as AWS, Azure, and DigitalOcean have their own rules that you must update separately.
5. Log In to Vesta
Open your browser and go to:
https://<your-server-IP-or-hostname>:8083
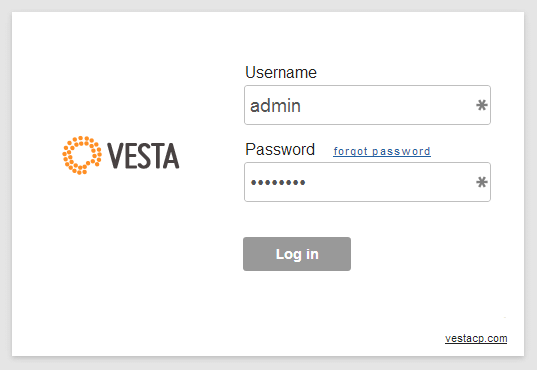
Log in as admin with the password shown at the end of the installation. Your browser may warn about the self-signed certificate. You can proceed, then install a trusted SSL certificate later.
To confirm the panel is running, check the service from the terminal:
systemctl status vesta
On older SysVinit systems, use service vesta status.
Troubleshooting
If the installation fails or the panel does not open, check these:
- The page at port 8083 won’t load: Port 8083 is blocked. Open it in your server firewall and in your cloud provider’s security group
- The installer stops with an error: Make sure you are running as root on a clean, supported OS. A previous web server, MySQL, or mail server often causes conflicts
- You can’t install VestaCP on Linux server on a newer OS: The installer supports only the versions listed above. Use a supported version, or consider HestiaCP for newer releases
- You lost the admin password: Run
/usr/local/vesta/bin/v-change-user-password admin NEWPASSWORDas root to set a new one - The panel is running but the browser shows a warning: This is the self-signed certificate. Replace it with a trusted certificate when you are ready
Conclusion
To install VestaCP on Linux server, connect as root, download vst-install.sh, run it, open port 8083, and log in as admin. Start from a clean, supported operating system, because most installation failures come from existing software. After logging in, you can add users, websites, DNS zones, and databases from the panel.
Frequently Asked Questions
What are the minimum requirements to install VestaCP on Linux server?
You need 512 MB of RAM, 20 GB of disk space, a 1 GHz CPU, and a supported operating system with root access.
Which operating systems does VestaCP support?
RHEL/CentOS 5, 6, and 7, Debian 7, 8, and 9, and Ubuntu 12.04 to 18.10. Newer releases are not officially supported.
What is the default VestaCP login URL?https://<your-server-IP-or-hostname>:8083. The username is admin, and the password is shown when the installation finishes.
Can I install VestaCP on a server that already hosts websites?
It is not recommended. The installer replaces the web, mail, and database services, so use a fresh server.
Related Articles
How to Fix Roundcube “Database Error: Connection Failed” in VestaCP
How to Force Webmail to Use SSL in VestaCP
Talk to Our Technology Experts
Planning to set up a hosting control panel or manage your own Linux servers? Our team can install and configure your control panel, secure your server, and handle ongoing hosting support through our DevOps and Cloud Services.
Connect with our technology experts.